 ultimate-guide
7 Signs of Bad Pressure Washing Damage on Your Property
Table of Contents
- Why Bad Pressure Washing Causes Expensive Damage
- 7 Signs of Bad Pressure Washing Damage to Look For
- Pressure Washing vs Soft Washing: Which Method Causes Damage?
- How to Remove Black Mould from Render Walls Without Damage
- Repairing Damaged Block Paving Joints After a Bad Clean
- When to Call a Professional for a Damage Assessment
- Preventing Pressure Washing Damage on Your Property
- Frequently Asked Questions
Last Updated: September 6, 2026
A pressure washer can transform a grimy driveway in an afternoon, but in the wrong hands, it can also cause thousands of pounds of damage in seconds. The signs of bad pressure washing damage are often subtle at first, yet they lead to costly repairs that far exceed the price of a professional clean. At Refresh Revive Exterior Cleaning, we regularly assess properties where DIY cleaning or cowboy operators have left surfaces permanently scarred.
This guide explains exactly what to look for, why the damage happens, and how to protect your property. We cover the seven most common signs of pressure washing damage, the difference between pressure washing and soft washing, and when it is time to call in a professional for a damage assessment. Pressure washing damage is preventable, but only if you know what causes it and how to spot it early.
Why Bad Pressure Washing Causes Expensive Damage
The physics of pressure washing explains most of the harm. A domestic jet washer can deliver water at over 2,000 PSI, which is enough force to strip paint, erode mortar, and carve channels into soft concrete (hse.gov.uk). When that concentrated stream meets a surface at the wrong angle, from too close a distance, or for too long, it acts like a sandblaster rather than a cleaner.
Most damage is not caused by a single dramatic mistake. It accumulates through poor technique: holding the lance at a steep angle, lingering on one spot, or using a narrow nozzle on a delicate surface. The result is surface erosion that may not be visible for weeks, until dirt settles into the newly roughened texture and reveals the extent of the harm.
Property owners often discover the damage only when they try to sell. Surveyors flag eroded pointing, pitted block paving, and water ingress as defects, which can delay a sale or reduce the offer price. Repairing this damage is significantly more expensive than cleaning the surface correctly in the first place.
7 Signs of Bad Pressure Washing Damage to Look For
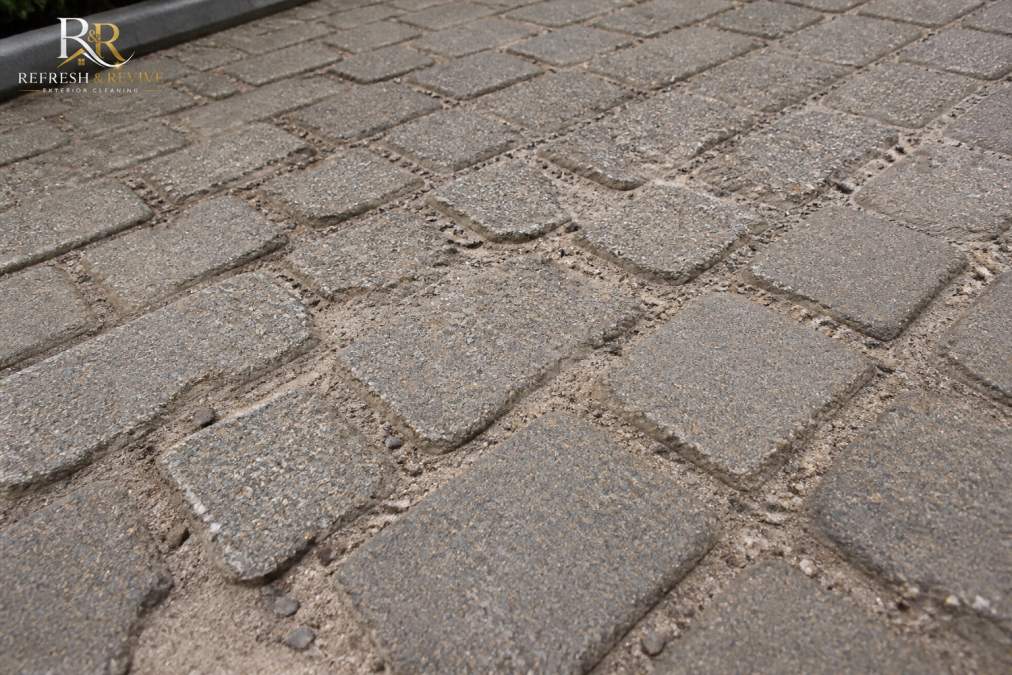
The seven warning signs below cover the most common types of damage across typical UK exterior surfaces. If you notice any of these after a clean, act quickly to prevent further deterioration.
1. Etched or Pitted Concrete and Block Paving
Concrete and block paving have a smooth, dense surface layer that resists water and stains. High-pressure washing erodes this layer, exposing the softer aggregate underneath. The result is a rough, pitted texture that traps dirt and moss far more easily than before.
Run your hand across the surface after it dries. A properly cleaned driveway should feel smooth. If it feels coarse, like sandpaper, the surface layer has been stripped. This damage is permanent; the only remedy is resurfacing or replacing the affected blocks.
2. Loose or Missing Joint Sand in Block Paving
Joint sand locks block paving together and prevents movement. A pressure washer aimed directly at the joints blasts this sand out, leaving gaps between the blocks. Within weeks, the blocks begin to shift under vehicle weight, creating an uneven, unstable surface.
Check the joints after cleaning. If you can see daylight between blocks or the sand level has dropped noticeably, the joints have been damaged. Replacing joint sand is a messy but essential repair, covered later in this guide.
3. Chipped or Cracked Bricks and Mortar
Brick surfaces, especially older properties with softer lime mortar, are particularly vulnerable. High-pressure water erodes mortar faster than the bricks themselves, leaving deep channels that allow water to penetrate the wall. In severe cases, the water stream can chip the brick faces, causing permanent cosmetic damage.
Inspect brickwork closely after cleaning. Look for fresh chips, crumbled edges, or mortar joints that have receded below the brick surface. Water penetration through damaged mortar can lead to damp inside the property, a far more serious problem.
4. Stripped Protective Sealant
Many driveways and patios are treated with a protective sealant that repels water, oil, and stains. Pressure washing removes this layer along with the dirt, leaving the surface exposed. Without the sealant, the surface stains more easily and deteriorates faster.
You may not notice this immediately, but the signs appear within months. Oil spills from cars will stain where they previously wiped clean, and water will darken the surface rather than beading on top. Reapplying sealant is an additional cost that a careful clean would have avoided.
5. Water Forced Into Brickwork and Gaps
The most insidious damage is invisible. High-pressure water can force moisture deep into brickwork, behind render, and under roof tiles. This trapped moisture leads to damp, mould growth, and in winter, frost damage as the water freezes and expands.
Look for dark patches on internal walls, a musty smell, or damp appearing in rooms adjacent to the cleaned surface. Water ingress can also weaken the bond between render and the wall beneath, causing it to blow and crack over time.
6. Damaged or Dislodged Roof Tiles and Granules
Roof cleaning with a pressure washer is exceptionally risky. The water stream can lift tiles, dislodge them from their fixing, and strip the protective granules from the surface of concrete and clay tiles. These granules give tiles their colour and protect them from UV damage.
Walk around your property and look for granules in the guttering or on the ground below the cleaned roof. Check for tiles that appear lighter in colour or have a bald, rough appearance. A single dislodged tile can lead to leaks and costly internal water damage.
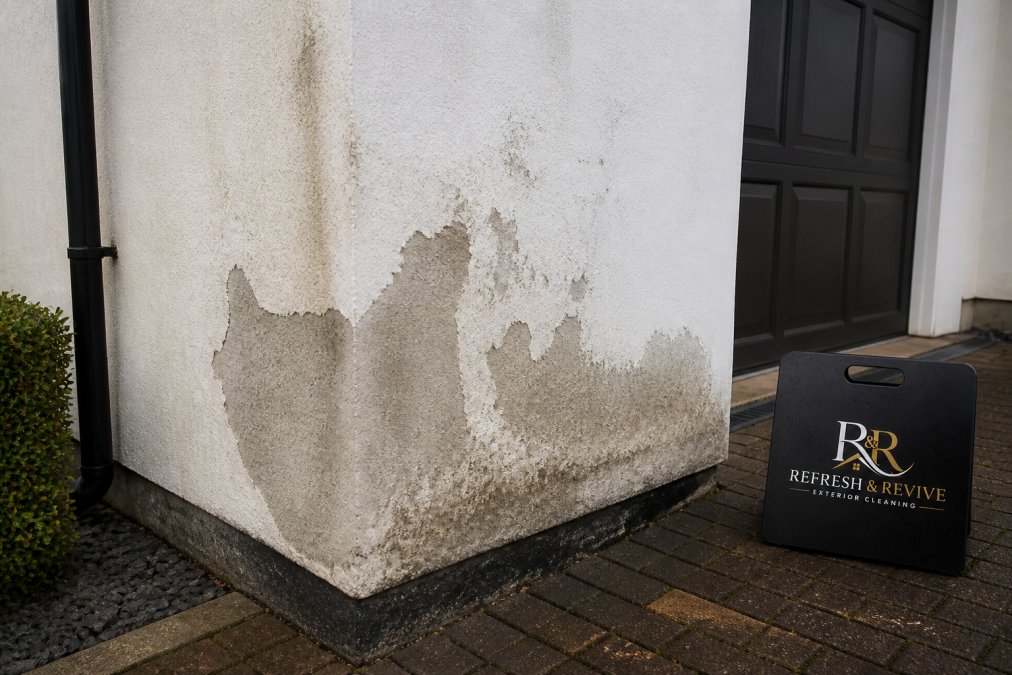
7. Unsightly Streaking or Etching on Render
Render is a soft, porous material that cannot withstand high pressure. A pressure washer will create visible streaks, grooves, and a patchy appearance as it removes the smooth outer layer. In severe cases, the render can be breached entirely, exposing the surface to moisture and requiring a full re-render.
Inspect render from an angle to catch subtle imperfections. Look for a washed-out, uneven appearance or lines that follow the path of the lance. Unlike dirt, these marks will not wash away; they are permanent scars in the material itself.
Pressure Washing vs Soft Washing: Which Method Causes Damage?
The key difference between the two methods comes down to pressure and chemistry. Pressure washing relies on high-pressure water to blast dirt away, which is what causes the damage described above. Soft washing uses low pressure combined with specialist cleaning solutions to dissolve dirt, algae, and mould at the surface, which is then rinsed away gently.
For most exterior surfaces, soft washing is the safer choice. It cleans effectively without eroding the surface or forcing water into gaps. The table below summarises which method suits common surfaces.
| Surface | Recommended Method | Why |
|---|---|---|
| Block paving and concrete | Soft washing or low-pressure rinse | Prevents pitting and joint sand loss |
| Brickwork and mortar | Soft washing | Avoids mortar erosion and water ingress |
| Render | Soft washing | Prevents streaking and surface damage |
| Roof tiles | Soft washing | Protects granules and tile fixings |
| Patios and natural stone | Soft washing | Preserves sealant and surface finish |
The trade-off is time. Soft washing takes longer because the cleaning solutions need time to work before rinsing. The result is a cleaner surface that stays clean for longer, because the treatment kills the organic growth rather than just blasting the visible part away.
How to Remove Black Mould from Render Walls Without Damage
Black mould on render is a common problem in the damp climate of North West England, and it is tempting to reach for a pressure washer to shift it. Resist that urge. A far safer approach is a targeted treatment that kills the mould at its source without harming the render.
The first step is to treat the mould with a dedicated biocide or mould remover designed for exterior masonry. Apply the product according to the label instructions and the safety data sheet, and observe the appropriate COSHH controls (hse.gov.uk). Allow it to dwell for the recommended time so it can penetrate and kill the mould spores.
Once the treatment has worked, rinse the surface gently with clean water at low pressure. The dead mould should wash away easily. For stubborn patches, a soft brush can be used to lift the residue without scratching the render. Always follow the product label for correct application and dilution.
Repairing Damaged Block Paving Joints After a Bad Clean
If your block paving has lost its joint sand, the repair is straightforward but requires patience. Begin by ensuring the surface is completely dry, as damp sand will not settle properly into the joints. If the blocks are still dirty, clean them using a gentle method first.
Spread kiln-dried jointing sand across the surface and brush it into the joints using a stiff broom. Work the sand in thoroughly, then compact it using a plate vibrator if you have access to one. This settles the sand deep into the joints. Top up with more sand and repeat until the joints are full.
Finally, sweep away the excess sand. The paving should now be stable and level. If the blocks themselves have shifted or the sub-base has been washed out, you may need to lift and relay the affected area, which is a job best left to a professional.
When to Call a Professional for a Damage Assessment
Some damage is beyond a DIY repair. If you notice cracked or chipped bricks, eroded mortar, water ingress into the property, or damage to roof tiles, it is wise to seek a professional assessment. A specialist can determine the extent of the damage and recommend the most cost-effective repair.
Property owners often call us after a bad experience with another cleaning company. We provide honest, no-obligation assessments and will tell you whether a surface can be restored or needs more significant work. Our focus is on protecting your property, not selling you unnecessary repairs.
If a recent clean has left your surfaces looking worse, do not attempt to fix it with more high-pressure washing. That will compound the damage. A professional will assess the situation and advise on the safest way to restore your property.
Preventing Pressure Washing Damage on Your Property
Prevention is always cheaper than repair. The simplest rule is to avoid high-pressure cleaning on delicate surfaces entirely. For block paving, brickwork, render, and roofs, always choose a low-pressure method or a professional soft washing service.
If you do clean surfaces yourself, use the lowest pressure setting that will do the job. Hold the lance at a wide angle and keep it moving constantly. Never concentrate the stream on one spot, and keep the nozzle at a safe distance from the surface. Test on an inconspicuous area first to gauge the effect.
For peace of mind, consider hiring a professional who uses surface-specific, low-pressure methods. At Refresh Revive Exterior Cleaning, our White Glove Standard™ ensures every surface is cleaned with the appropriate technique, protecting your property, planting, and lawns while restoring brilliant results. We are fully insured and offer no-obligation quotations, with a responsive service and a one working day turnaround.
Bad pressure washing damage is a real risk for any property owner, but it is entirely avoidable. The key is understanding which surfaces are vulnerable and choosing a cleaning method that matches the material. If you suspect your property has already been damaged, act quickly to prevent further deterioration.
Refresh Revive Exterior Cleaning specialises in safe, surface-specific cleaning across the North West. Our low-pressure treatments protect render, roofs, and block paving while delivering the results you want, and our maintenance visits prevent regrowth so your property stays looking its best. Get in touch for a free quote and let us restore your property without the risk.
Frequently Asked Questions
What does pressure washing damage look like on block paving?
Bad pressure washing damage on block paving typically shows as grooves or pits in the surface where the water jet has eroded the top layer. You may also notice the sand between the blocks has been washed away, leaving loose joints and blocks that rock underfoot. In severe cases, the edges of the blocks look chipped or rounded. If you see these signs, stop cleaning immediately and assess the extent of the damage.
Can high-pressure washing ruin render walls?
Yes, high-pressure washing can permanently ruin render. The force of the water can crack the render, blow holes in it, or strip away the top coat, leaving an uneven surface. Water can also be forced behind the render, causing it to blow or detach from the wall. For render, a low-pressure soft washing method is always safer and more effective at removing black mould and algae without causing structural damage.
How do I know if a contractor has damaged my driveway?
Look for these signs after a professional clean: a rough, pitted surface instead of a smooth one, sand washed out from between block paving joints, and any cracks or chips that were not there before. If the driveway looks worse or different in texture compared to before, it has likely been damaged by excessive pressure. You should document the damage with photos and contact the company to discuss remediation.
Does pressure washing remove the protective sealant from patios?
Yes, high-pressure washing is a common cause of stripped patio sealant. The water jet is strong enough to abrade the surface and remove the protective layer, leaving the stone or concrete exposed to the elements. Without sealant, patios are more prone to staining, moss growth, and frost damage. If your patio looks dull or more porous after cleaning, the sealant has probably been removed, and you will need to reapply it.